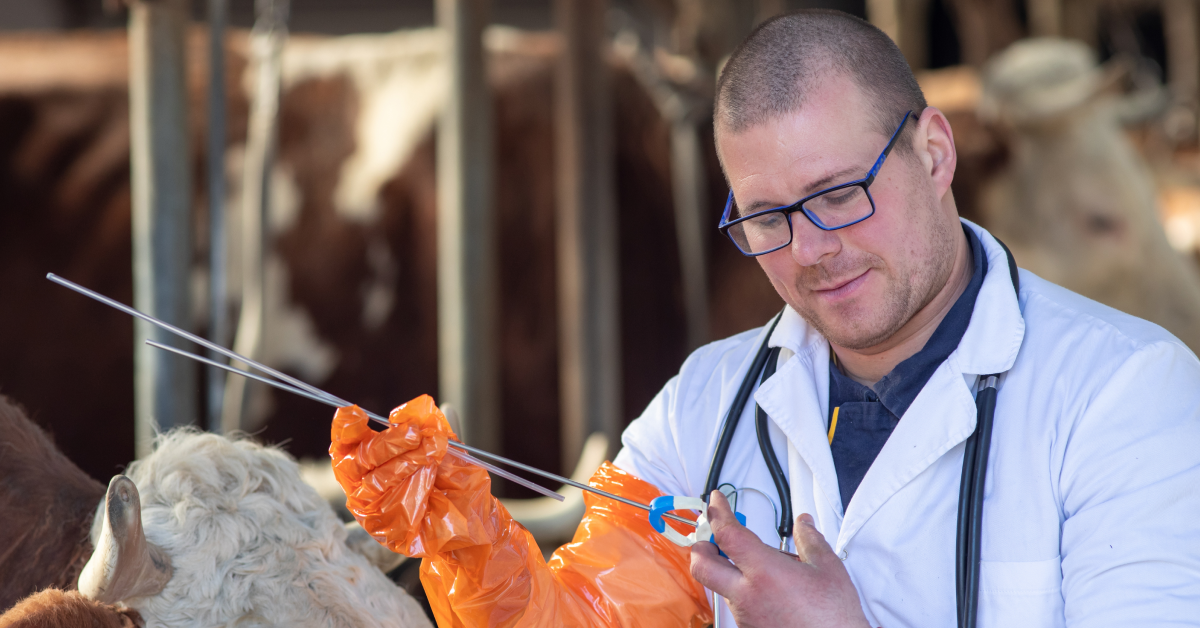

Grain farming sits at the heart of global agriculture. Cereals such as corn, wheat, and rice feed billions and fuel everything from bread to biofuels. The scale is staggering: in 2025, the Food and Agriculture Organization (FAO) forecast world cereal production at 2,971 million tonnes, 3.8 % higher than 2024. In the United States alone, about 1.88 million farms manage 876 million acres of farmland. Those acres produce not only grain for human consumption but also feed for livestock and inputs for industrial processes.
If you’re a farm manager or agribusiness owner, understanding grain farming is essential. This guide breaks down everything you need to know: picking the right crop, matching it to your climate and soils, planning budgets and field work, managing harvest and storage, and even when to market your grain.
Whether you manage a small family farm or oversee commercial grain elevators, we will help you optimize your fields, mitigate risk, and make informed decisions.
What is Grain Farming?
Grain farming refers to growing cereal crops, including true cereals like wheat, corn, barley, oats, sorghum, millet, and rice, and “pseudo‑cereals” such as buckwheat and quinoa. These crops produce hard seeds that can be harvested and stored dry. Grain farms vary from small family operations to vast commercial enterprises spanning thousands of acres. Regardless of scale, the value chain follows a similar flow: farmers source inputs (seed, fertilizer, fuel), prepare and plant fields, manage crops throughout the season, harvest and store grain, and finally market it for food, feed, or industrial uses.
Differences between Traditional and Commercial Grain Farming
Traditional grain farming is often integrated into diversified family operations with mixed crops and livestock. Equipment may be older, labour is family‑based, and grain is usually marketed through local cooperatives.
Commercial grain farming, by contrast, emphasizes scale and efficiency. Operations may specialize in a few commodity grains, use high‑horsepower machinery, adopt precision‑agriculture technology, and rely on contracted labour.
The outputs typically enter global supply chains: for example, U.S. corn exports are forecast at 75 million tonnes in 2025/26. Both models share the basic production stages, but commercial farms must manage larger inventories, tighter margins, and more complex logistics.
Types of Grain & How to Choose What to Grow
Grains are broadly divided into cereal grains and pseudo-cereals, each with distinct origins and roles in modern agriculture.
1. Major Cereal Grains
Cereals belong to the Poaceae (grass) family and form the backbone of global grain farming. These include:
- Wheat: Dominant in temperate regions; key for flour, bread, and pasta production.
- Corn (Maize): The world’s most widely grown grain, used for food, feed, and ethanol fuel.
- Rice: Staple crop for over half of the world’s population, thriving in warm, water-intensive conditions.
- Barley: Essential for animal feed and brewing.
- Oats: Grown in cooler climates, valued for human consumption and livestock feed.
- Sorghum & Millet: Drought-resistant options for arid and semi-arid regions.
2. Pseudo-Cereal Grains
Unlike cereals, pseudo-cereals aren’t true grasses but produce seeds used similarly to cereal grains. Key examples include:
- Buckwheat: Fast-growing crop suited for poor soils and short seasons.
- Quinoa: High in protein and amino acids, adapted to high altitudes and variable climates.
- Amaranth: Drought-tolerant and nutrient-dense, increasingly popular in health-conscious markets.
Cereals dominate global production; maize, wheat, and rice together account for 91 % of all cereals produced, but pseudo‑cereals can diversify rotations and tap into specialty markets.
Factors to Choose Your Grain crop
Selecting the right grain hinges on several factors:
- Market demand and price: Monitor commodity markets, local elevator bids, and contract opportunities. Specialty grains like quinoa fetch premium prices but have smaller markets.
- Input costs and profitability: Evaluate seed, fertilizer, irrigation, and labor costs per acre. Compare projected revenue per bushel to per‑acre expenses.
- Rotation benefits: Rotating grains with legumes or forages can improve yields. As per the study, wheat yields increased 40 % when wheat followed soybeans and 20 % when it followed sunflowers compared to continuous wheat.
- Equipment compatibility: Ensure your planter, combine, and storage facilities match the crop’s needs. Corn requires combines with corn heads; small grains need draper headers.
- Local demand and storage: Consider feedlot, mill, or malting demand in your region. Evaluate your ability to store grain until favorable prices emerge.
Climate & Location: Matching Crops to Conditions
Climate is one of the most important determinants of grain crop success. Grains can be broadly divided into cool‑season and warm‑season types based on their temperature preferences and photosynthetic pathways.
Cool & Warm Season Grains
Cool‑season grains like spring wheat, oats, and peas use the C3 photosynthetic pathway. They germinate at soil temperatures around 35–40 °F and tolerate frost. Planting during the first three weeks of April maximizes yield; every day of delay beyond the optimum reduces yield potential by roughly 1.5 % per day. Cool‑season crops benefit from early planting to avoid summer heat stress. They generally require adequate moisture and perform well in temperate or high‑latitude regions.
Warm‑season grains like corn and sorghum utilize the C4 pathway. They require warmer soils, corn seed, for example, needs 50 °F soil temperature to germinate. Warm‑season grains start growth later in spring and thrive in higher temperatures; they have greater heat and drought tolerance but are less frost-tolerant. These crops are suitable for regions with longer frost‑free periods and higher summer temperatures.
Regional Considerations and Timing Shifts
Planting windows vary by region. In northern zones, cool‑season grains should be sown as soon as the soil is workable to maximize the vegetative period. In warmer climates, spring planting may extend into May but should still precede summer heat. Warm‑season grains are typically planted in late April through May in the U.S. Corn Belt; delayed planting reduces yields and test weights. Soil testing is essential before planting any grain. Assess soil pH, nutrient levels, and moisture to select the right crop and fertilizer program.
Regional climate also influences harvest timing. Cool‑season grains mature earlier and may be harvested in mid‑summer, while warm‑season grains often reach maturity in late summer or fall. Understanding local frost dates, rainfall patterns, and heat units helps align crop choice and management with environmental conditions.
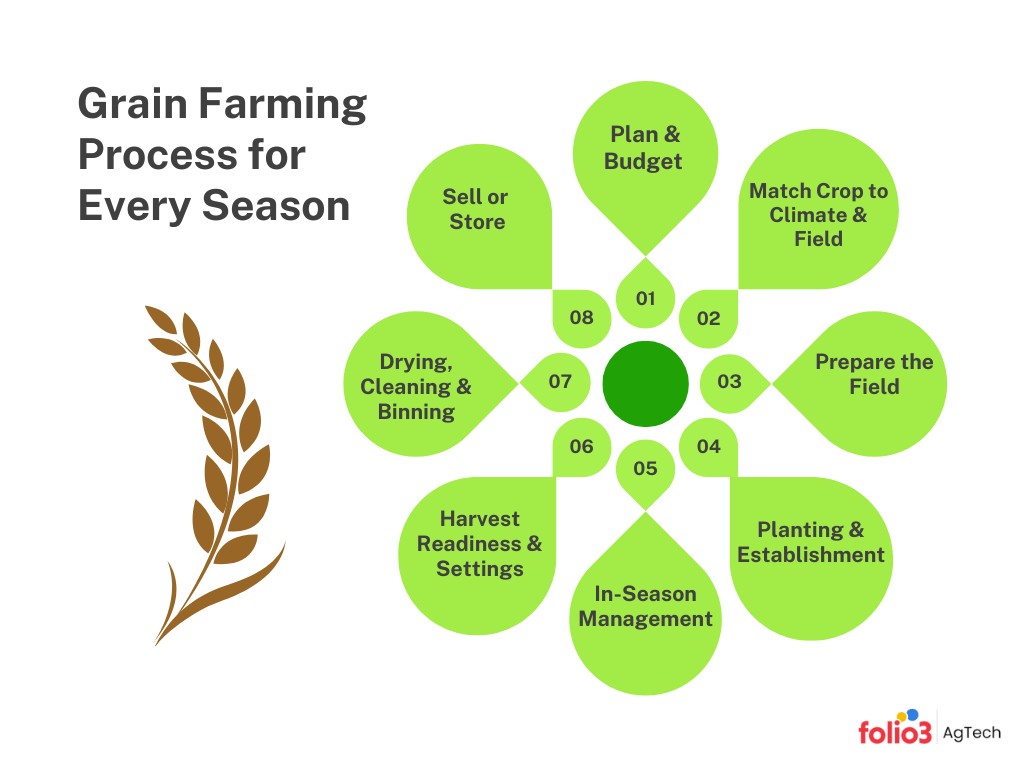
The Grain Farming Method: 8 Steps You Can Follow Every Season
The grain farming process can be distilled into eight repeatable steps. Each step builds on the previous one, guiding you from pre‑season planning to marketing grain. Below, each step is introduced with its purpose, followed by key performance indicators (KPIs) and potential risks.
Step 1 – Plan & Budget (Pre-season)
Before a blade moves, plan your season as it is the foundation of successful grain farming. Begin by deciding which crops to grow, how many acres to dedicate to each and what varieties or hybrids to plant. Develop a detailed input plan covering seed, fertilizer, pesticides, fuel and labor. Build a budget that projects cost per acre and cost per bushel, incorporating expected yields and price scenarios. This planning should include contingency funds to buffer against price volatility or weather shocks. Without a robust plan, it’s easy to overspend on inputs or underestimate cash‑flow needs.
Mini‑KPIs:
- Target yield per acre (e.g., 180 bu/ac corn or 60 bu/ac wheat).
- Projected cost per bushel (inputs divided by expected yield).
- Working capital buffer (percentage of total costs held in reserve).
Risks:
- Overbuying inputs: Purchasing excess seed or fertilizer ties up cash and may result in waste if acreage changes.
- Weak cash‑flow plan: Insufficient working capital can limit mid‑season inputs or delay equipment repairs, reducing yields.
Step 2 – Match Crop to Climate & Field
After budgeting, match your crop selection to the climate and specific field conditions. Identify whether the field is best suited to cool‑ or warm‑season grains based on temperature, frost‑free days and available heat units. Use soil tests to measure pH and nutrient levels; adjust fertility with lime or amendments if needed. Evaluate soil moisture and texture to determine if irrigation or drainage improvements are required. Confirm planting windows for your climate zone, remember that cool‑season crops should be planted when soils reach 35–40 °F and warm‑season crops such as corn when soils reach 50 °F.
Mini‑KPIs:
- Soil pH within crop‑specific target range (e.g., 6.0–7.0 for most cereals).
- Nutrient plan (nitrogen‑phosphorus‑potassium units per acre).
- Soil moisture at planting (percent of field capacity).
Risks:
- Poor stand from cold or wet soils: Planting warm‑season seeds into cold, saturated soils can reduce emergence and uniformity.
- Mismatched varieties: Choosing varieties unsuited to local climate or disease pressure can reduce yields and quality.
Step 3 – Prepare the Field (Tillage/Residue/No-till)
Field preparation sets the stage for uniform emergence and root development. Select a tillage strategy—full tillage, reduced tillage, strip tillage or no‑till—based on soil type, residue levels and erosion risk. Primary tillage can incorporate crop residue and loosen compaction but may increase erosion and moisture loss. No‑till preserves soil structure and moisture but requires effective weed control and residue management. The goal is to create a firm, uniform seedbed while minimizing compaction and soil disturbance. Manage residue to balance soil cover (which prevents erosion) and seed‑to‑soil contact.
Mini‑KPIs:
- Seedbed firmness (uniform firmness across the row zone).
- Residue cover percentage (maintain 30 % or more for conservation tillage).
- Compaction checks (absence of hardpan layers measured with a penetrometer).
Risks:
- Erosion: Aggressive tillage can leave soil vulnerable to wind and water erosion.
- Moisture loss: Excessive tillage exposes soil surface, accelerating evaporation and reducing seedling emergence.
Step 4 – Planting & Establishment
Successful planting depends on accurate seed placement and planter calibration. Determine the appropriate seeding rate, depth and row spacing based on crop species, seed size and field conditions. For example, corn may be planted at 30‑inch row spacing with seeding rates around 32 000 plants per acre, while small grains may be drilled at 7.5‑inch spacing with higher seeding density. Plant when soil temperatures are within the crop’s optimum range; delayed planting can decrease yields by up to 1.5 % per day for cool‑season grains. Calibrate planters to ensure accurate seed depth and uniform spacing; use starter fertilizer if soil tests show deficiencies.
Mini‑KPIs:
- Emergence percentage (ratio of emerged plants to seed planted).
- Uniformity of stand (measured by coefficient of variation of plant spacing).
- Replant threshold (maximum acceptable stand loss before replanting).
Risks:
- Uneven emergence: Planting into variable soil conditions or inconsistent depth can lead to uneven stands and yield loss.
- Pests at stand establishment: Early pests or diseases can reduce the stand; monitor and treat as needed.
Step 5 – In-Season Management
Now manage your growing crop. Follow your fertilizer schedule: side-dress nitrogen on corn or wheat if needed based on tissue tests or plant color. Time herbicide and insecticide sprays carefully. If you see weed escapes or pest thresholds met, act before they cause big losses. Rotate herbicide modes of action to prevent resistant weeds.
If irrigation is available, apply it in key windows (for corn, that’s usually V6 and pollination). Also monitor growth degree days (GDD) to predict development. Keep records of weather, scouting, and any applications. Use tissue or leaf tests mid-season to confirm nutrient uptake, adjusting plans if deficiencies appear.
Mini‑KPIs:
- Tissue test levels (nitrogen, phosphorus, potassium and micronutrients).
- Weed escapes (number of weeds per square foot after herbicide application).
- Growing Degree Unit (GDU) tracking to estimate crop development stage.
Risks:
- Resistance: Repeated use of a single herbicide mode of action can lead to weed resistance.
- Missed application windows: Unfavourable weather or equipment breakdowns can delay fertilizer or pesticide applications.
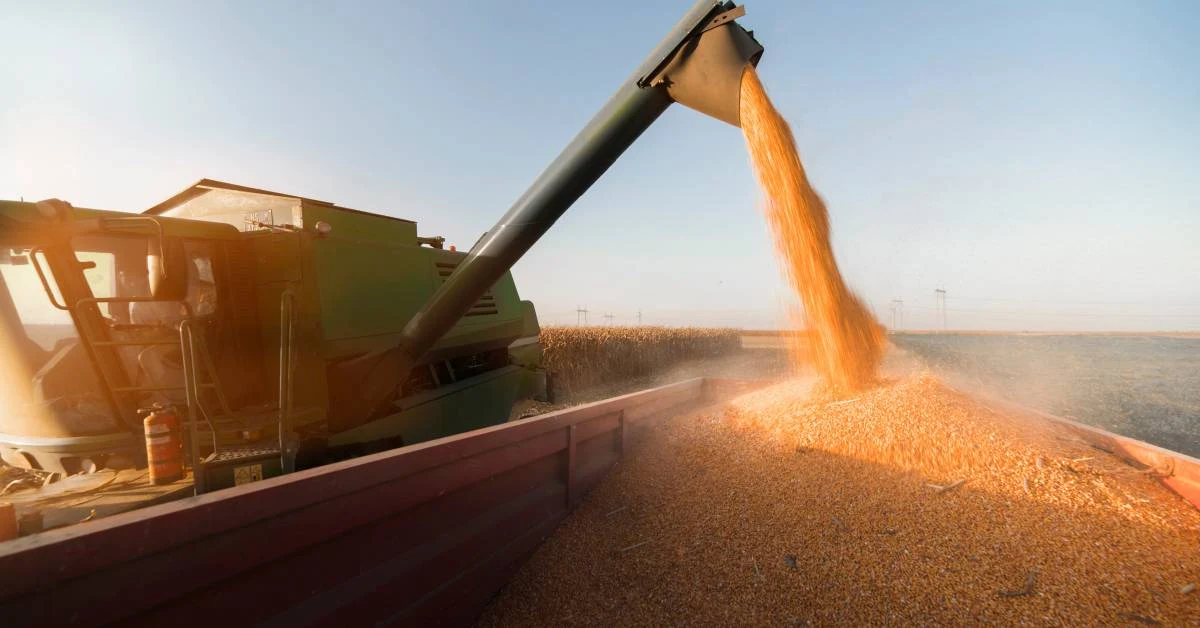
Step 6 – Harvest Readiness & Combine Settings
As the grain matures, get ready to harvest. Monitor moisture – for corn, aim to combine around 15–20% moisture; for soybeans, 13–15%; for small grains (wheat, barley), 12–14%. This maximizes quality and storage safety. Adjust your combine settings carefully: header height to avoid cutting too low or losing heads, drum/rotor speed just enough to thresh but not crush kernels, and sieve/shaker settings to clean grain without blowing it out.
Monitor combine loss by catching and weighing grain left on the ground. Use yield monitors and calibrate them to improve accuracy. Aim to harvest during periods of low humidity and moderate temperatures to maintain grain quality. Weather delays pose a major risk; plan to harvest as soon as grain reaches safe moisture levels and field conditions permit.
Mini‑KPIs:
- Header loss (bushels per acre lost at the header).
- Cracked grain percentage (proportion of kernels damaged during threshing).
- Dockage (foreign material and broken kernels in grain sample).
Risks:
- Weather delays: Rain or early frost can delay harvest and reduce quality.
- Shatter loss: Over‑drying in the field causes seed heads to shatter, leaving grain on the ground.
Step 7 – Drying, Cleaning & Binning
Post‑harvest handling preserves grain quality and prevents spoilage. Dry grain to a safe moisture for long-term storage, typically around 14–15% for many grains with aeration. Use your dryer and aeration fans to cool the grain and avoid hot spots. Clean out trash, fines, and broken kernels before binning, since debris can heat up and spoil. When filling bins or silos, distribute grain evenly. Install temperature cables or regular probes in big bins to detect hotspots early.
Keep an eye on grain quality over time. Record the moisture and temperature of grain on a QA log. Turn on aeration fans during temperature extremes to keep the grain within 10°F of ambient. Even a few degrees of rise can indicate a problem. Good storage management is crucial: studies show that each 1% rise in moisture or 6°C rise in temperature roughly halves a seed’s shelf-life.
Mini‑KPIs:
- Grain temperature and temperature differential (ΔT) across the bin.
- Number of hot spots detected.
- Moisture shrink percentage (weight loss during drying).
Risks:
- Spoilage: High moisture and warm temperatures promote mold and mycotoxin formation.
- Bridging: Fine material can cause grain to bridge, leading to potential engulfment hazards.
- Dust hazards: Accumulated dust can cause explosions; proper housekeeping is essential.
Step 8 – Sell or Store (Marketing Checkpoint)
The final step is deciding whether to sell grain immediately or store it for future marketing. Evaluate current cash prices, basis levels, and seasonal price trends. Calculate your breakeven price by dividing total production costs by expected yield. Compare the basis against five‑year averages to determine if basis levels are favourable. Consider the cost of storage (interest, shrinkage, maintenance, and insurance) versus potential price appreciation. Forward contracts, futures, or options can lock in prices and manage risk.
Mini‑KPIs:
- Breakeven price (cost per bushel).
- Basis relative to five‑year average.
- Percentage of crop sold by quarter.
Risks:
- Storage costs exceed price gains: Holding grain too long may erode profit if prices remain flat or decline.
- Quality downgrades: Grain stored too long may lose grade due to moisture or pest damage, reducing its market value.
Seasonal Checklist
These seasonal steps keep your grain farming operation running smoothly. By staying organized from spring through winter, you catch issues early and set up next year’s success.
- Spring: Calibrate your planter, test soil and pH, tune the seed drill or planter. Ensure seedbeds are ready. Apply pre-emergent weed control once the soil is warm. (Clean out and grease equipment now.)
- Summer: Scout fields weekly for pests, diseases, and nutrient issues. Do in-season fertilizer or herbicide passes as scheduled. If irrigating, check all pivots or hoses. Keep an eye on the weather, be ready for heat or drought stress.
- Fall: As harvest approaches, test your combine with loss checks and yield monitor calibration. Prepare bins, repair any leaks, and clean out old grain. Plan for safe harvest moisture, and drying needs. After harvest, promptly dry and store the grain to targets.
- Winter: Maintain machinery, check wear, change oil, sharpen blades, update firmware on monitors. Review last year’s yields and costs, and book input orders. Negotiate grain contracts for next spring. Attend extension meetings or webinars to stay updated on new varieties or regulations.
How Folio3 AgTech Grain ERP Supports Smarter Grain Farming
Modern grain farming generates a lot of data, field records, yield maps, grain inventory levels, contracts, lab grades, and more. Digital tools are no longer a luxury but a necessity. Studies show most large farms now use precision ag tech (auto-steer on 70% of large farms, yield monitors on 68%), primarily to increase yields, save labor time, and reduce input costs.
A Grain ERP system ties all those pieces together, and as a farm manager, you can see the whole picture in one dashboard. The Folio3 AgTech’s Grain ERP lets you:
- Track Grain from Bin to Bushel: View real-time inventory in every bin and silo, with live level readings and moisture/shrinkage alerts. Know exactly how much grain of each type you have on hand, and its quality.
- Automate Recordkeeping: Store digital scale tickets, grading test results, and purchase contracts. No more paper slips lost in the office, every load in or out is logged automatically and linked to fields and buyers.
- Integrate Field & Finance Data: Link your yield maps and input costs. See crop margins by field, batch, or region. For instance, compare actual harvest results vs. your pre-season budget right in the system.
- Optimize Logistics: Schedule loads and trucks based on inventory and contract dates. The ERP can alert you when a forward contract must be delivered or when bin levels hit reorder triggers.
- Stay in Compliance: Record chemical applications, organic certifications, or sustainability audits within the system. Folio3 AgTech’s ERP can generate traceability reports or quality logs on demand.
Conclusion
Grain farming is a complex cycle of decisions, from picking seeds to selling the final bushels. But by breaking it into these steps and tracking key metrics, you can run your grain fields like a high-performance business. Remember, the best farms stay ahead through planning: set realistic yield targets, match crops to your climate, monitor your fields closely, and minimize losses at harvest and in storage. Embrace tools that help you do this – for example, digital crop records and an integrated Grain ERP.
In the end, grain farming success comes down to good data and hard work. You know your land and conditions best. With a clear plan each season and the right technology at your side, you’ll maximize yields, save on costs, and capture market value. Here’s to a year of bountiful grain harvests and profitable farming ahead!
FAQs
What Are the Main Stages of the Grain Farming Process?
Plan & budget → match crop to climate/field → prepare seedbed → plant & establish → in-season nutrition + weed/pest control → harvest → drying/cleaning/storage → sell or store. Each step affects yield, quality, and profit.
How Do Large Grain Farms Differ From Small-Scale Grain Farming?
Large farms lean on fleets of machinery, GPS/autosteer, and ERPs to manage thousands of acres at low unit cost. Smaller farms prioritize flexibility, tighter rotations, niche crops, and local buyers—often trading scale efficiency for resilience and quality premiums.
What Are the Biggest Challenges in Grain Agriculture Today?
Volatile input and grain prices, weather extremes, herbicide resistance, and labor/equipment bottlenecks. Your edge is tight cost control, diversified marketing, and agronomy that protects soil moisture and fertility.
How Is Technology Used in Grain Farming?
Precision tools (yield monitors, variable-rate seeding/fertilizer, drones) improve decisions in the field; bin sensors and aeration automation protect grain in storage; and Grain ERP links fields, inventory, contracts, and cash flow so you act on real-time data.